Account Functions
All the info provided in your Account can be managed through "Update Your Account" option located in your Account.
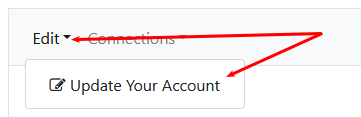
By clicking on "Update Your Account" you will be redirected to a form like the one you filled durring registration. There you can perform your changes.
NOTICE: Some fields are not editable! For example the name of the user or the name of a company.
One of the many cool features available in iShipNet is the Connections feature that allows users to connect with each other in a business relationship manner.
When you visit your account you should be able to see a Connections tab.
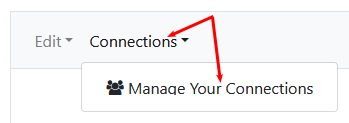
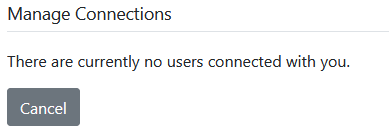
The first time that you click on "Manage Your Connections" and you are transferred to "Manage Connections" page, you see the following:
To ad a Company or an Individual to your Connections
In order to ad a user to your connections you will have to visit the other user's account, locate "Connections" tab and click on "Request Connection".
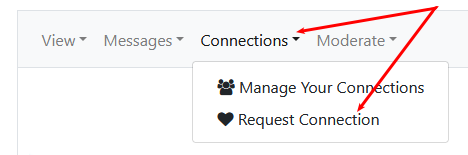
After you click on "Request Connection", the other user will receive a notification about your request and he will accept it or not.
Each iShipNet member has a personal space to store files that is called Directory. These files are available from everywhere the user has access to the web and a browser.
The files can be organized in 1st level Folders (no subfolders allowed).
Each folder you create, or file you upload is governed by your own privacy settings, so that you can restrict unwanted users to view your files.
Your Directory is accessed through your account Directory Tab and the first time that you will visit it looks like the following screenshot.
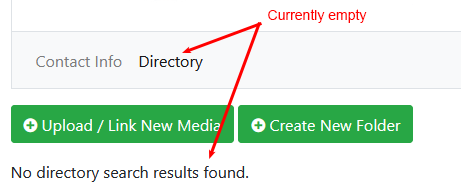
The options you have as you see, is to directly upload your files in your directory, or create folders and then upload your files in the folders.
Let's create a folder first...
Click on "Create new Folder" button and you will be transferred to the following page.
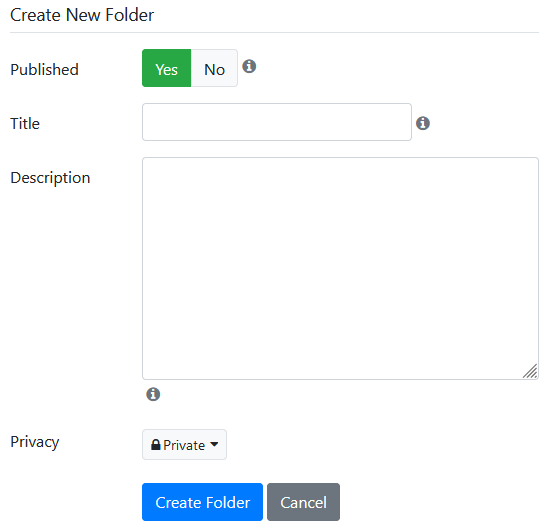
As you can see, here we have the following fields:
- Published: You can select if the Folder will be published or not. Not published means that no one but you will be able to see it.
- Title: Enter the title for this folder (relative to it's content)
- Description: Optionally write a description of this Folder to help you remember what kind of files it includes.
- Privacy: Privacy settings of your Directory is explained in detail in FAQs / Functions that need your attention / Privacy settings Directory. The default selected privacy option when creating Folders or uploading file is Private. Private means that only you can see it.
After we finish everything we click on Create Folder.
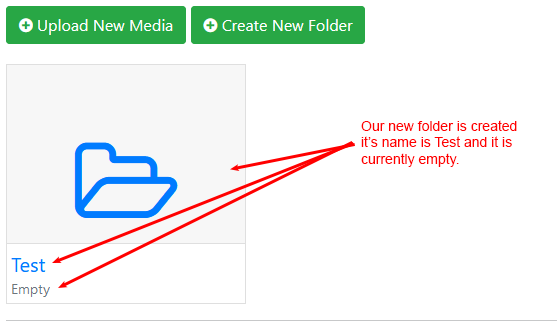
Now let's upload an image in our new Folder.
We click on our created Folder to get in it and we are transferred to a new page where we click on "Upload new Media" and we see the following:
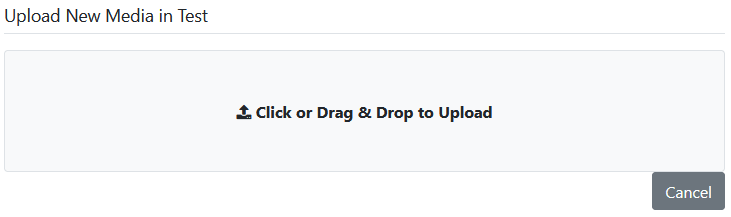
Click on "Click or Drag & Drop to upload" to open your device explorer and select the files to upload. When we select the file we want to upload, our page becomes like this:
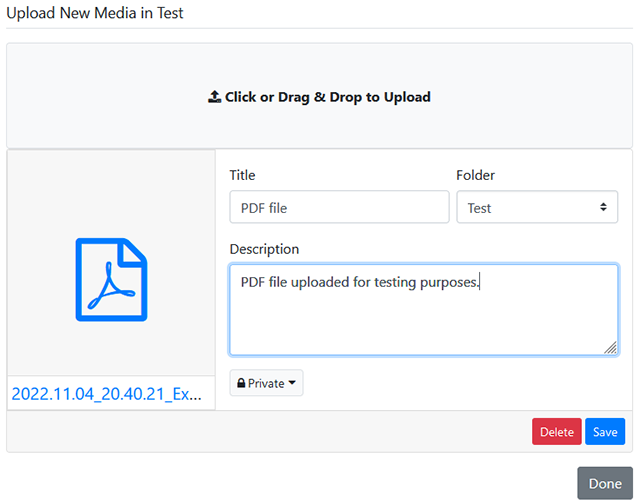
We click on Save to save Title, Description etc and ten we click on Done to return to our Directory. That's it! Our first PDF file is stored in out Directory, in folder "Test". The same procedure has to be followed if you want to create folders, or upload files to your account's Directory.
Recruitments is a new feature developed for iShipNet.
This feature allows all registered companies or individuals that are occupied in companies, to inform visitors of their account that they intend to hire people and let them contact directly with the account owner of the published recruitment announcement.
Companies with active Recruitment Announcements are listed in "Companies with active hiring opportunities" list where everyone can search through the offered Recruitment announcements.
Creating a Recruitment Announcement
Visit "Update Your Account" option located in your Account.
By clicking on "Update Your Account" you will be redirected to a page with title Edit Your Details that contains a form like the one you filled during registration. On this page locate "Recruitment Announcements" tab and click on it.

Your page changes and now you see the following form right after the form explanation. On this step of the form you can select the "Working Position" of the person you want to hire. There are 2 options:
On Board: Select this option if you want to hire someone to work On Board.
Office: Select this option if you want to hire someone to work at your Company's Office, or at your Employer Company's office.

According to your "Set Working Position" selection, 3 new fields appear.
Activities / Duties: Select the activities / duties that the person that you want to hire will have.
Persons to hire: Set the number of the persons you need for this position.
More information (Optional): Here you can write a text with any other info about the parent recruitment announcement.
When the above fields are filled and the announcement is complete, click on Update to save it.
Adding another recruiting announcement
Click on ![]() at the right side of the form to create another fieldset, make another announcement and save it by clicking on Update.
at the right side of the form to create another fieldset, make another announcement and save it by clicking on Update.
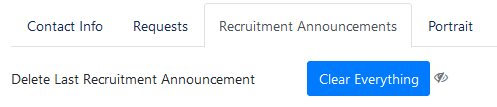
Removing (deleting) recruiting announcements
When you have more than one recruiting announcements, a red "-" button shows next to each one. You can remove one or more announcements by clicking on the red button and then by clicking on Update.
If you have only one recruiting announcement or if you have removed all of your announcements and there is one left that has no red button to remove it, you can delete it by clicking on "Clear Everything" (see image bellow) and save your Recruiting tab by clicking on Update.